How To Repair A Rotted Porch Post Base
Assessing the Damage to Your Porch Post Base
Before starting repairs, it's essential to evaluate the extent of the rot on the porch post base. This helps determine whether a full replacement or partial repair is needed.
Begin by visually inspecting the base of the post for signs of decay, such as discoloration, soft wood, or crumbling edges. You can use a flat-head screwdriver to gently probe the wood; if it sinks in easily, the wood is compromised. Check surrounding components like Joist Hangers and Post Base fittings to make sure they’re not affected by moisture or damage, as these components also provide stability.
If the rot is limited to the lower section, you may be able to fix it without removing the entire post. However, extensive rot may warrant a total replacement. Assessing the problem accurately at this stage will save you both time and money later in the project.
Preparing the Area for Repair
Preparation is the key to a successful and lasting repair. Ensure the area around the post is clear and clean before you begin the work.
First, lift the structure slightly using a temporary support beam or jack post to reduce weight on the rotted post. Be careful to distribute the weight evenly. Remove any trim or skirting around the post base to fully expose the damaged area. Clean the surrounding zone thoroughly by scraping off dirt, moss, or loose debris. Double-check the footing and nearby Post Base brackets for structural soundness.
Protection from moisture moving forward is critical, so consider waterproof barriers or coatings as part of your preparation. Also, check whether components like Timber Frame Connectors can be utilized for reinforcement during the repair work. This groundwork stage ensures that your repair will adhere properly and hold up under stress.
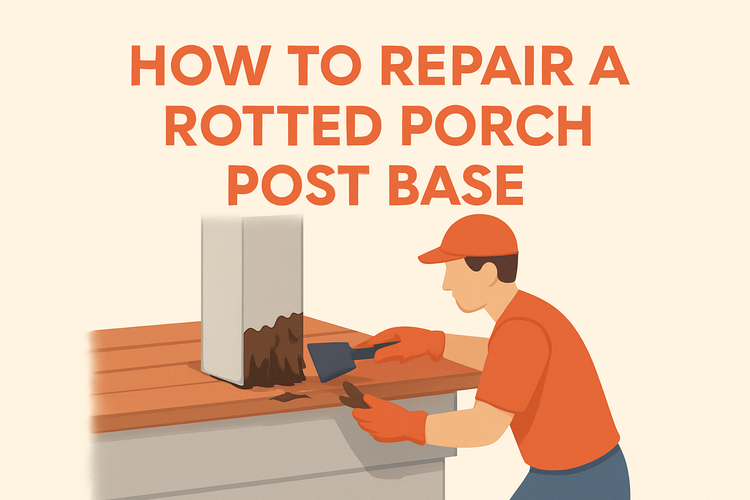
Cutting and Removing Rotted Wood
Once you're prepared, it’s time to cut away the damaged section of the post. Precision here can make or break your repair.
Use a reciprocating saw or hand saw to remove the rotted portion of the post. Aim to make a clean, level cut above the affected area so that the new insert will fit securely. Dispose of the rotted wood and clean the exposed core of any residual decay using a chisel or wood scraper. If rot extends into the footing or support base, these components must also be addressed to prevent further degradation.
At this point, reinforce the remaining good wood by applying a wood hardener. This chemical treatment soaks into the grain and strengthens it, creating a more reliable bonding surface for when you attach new materials. During this process, inspect any connected hardware such as Joist Hangers or Timber Frame Connectors to ensure no hidden damage was overlooked.
Installing a Repair Block or Post Replacement
Now comes the rebuilding stage — filling the void left by the removed wood or replacing the entire post, depending on the damage.
If only a portion of the post was affected, fabricate a replacement block from pressure-treated lumber of the same dimensions as the original. Attach this to the existing post using construction adhesive and structural screws or bolts. Reinforce the connection with steel plates or Post Base supports designed for vertical load-bearing.
When replacing an entire post, slide the new post into position and secure it using galvanized angle brackets or high wind connectors. Make sure the new post is plumb and properly seated into the base bracket. You might also consider using a water-resistant barrier around the base to prevent future damage.
The goal is for the new or repaired section to seamlessly integrate with the original structure while providing enhanced durability and weather resistance.
Finishing Touches and Preventative Measures
Repair is complete, but sealing and finishing are essential for long-term protection and appearance.
Seal all seams and joints with a high-quality paintable caulk to stop moisture penetration. Paint or stain the post to match the rest of the porch, using an exterior-grade product for durability. Reinstall any trim or ornamental pieces to restore the original aesthetic. Be sure to check all bolted and screwed connections one more time — components like Joist Hangers and Timber Frame Connectors must be firmly secured.
Long-term maintenance includes regular inspections and repainting as needed. Consider installing a drip edge or small roof overhang above the post to reduce direct water contact. Investing time into maintenance not only protects your repair but also extends the life of other components in your porch structure.