How To Install Lamp Post Base
Preparing the Site for Lamp Post Base Installation
Before installing your lamp post base, it’s crucial to assess and prepare the installation site. This step ensures stability and long-term durability of your lighting fixture.
Start by selecting a well-drained area with sufficient space around the post base. Use marking paint or stakes and string to outline the footprint of your base. Ensure the location isn’t obstructed by underground cables or services by checking with local utility providers. For areas exposed to high wind or vibrations, additional ground reinforcement or deeper anchoring might be necessary.
Once the area is confirmed safe and level, excavation can begin. Most installations require digging a hole roughly one-third the height of the post for optimal support. A gravel base can be added to aid drainage and help level the structure before pouring concrete.
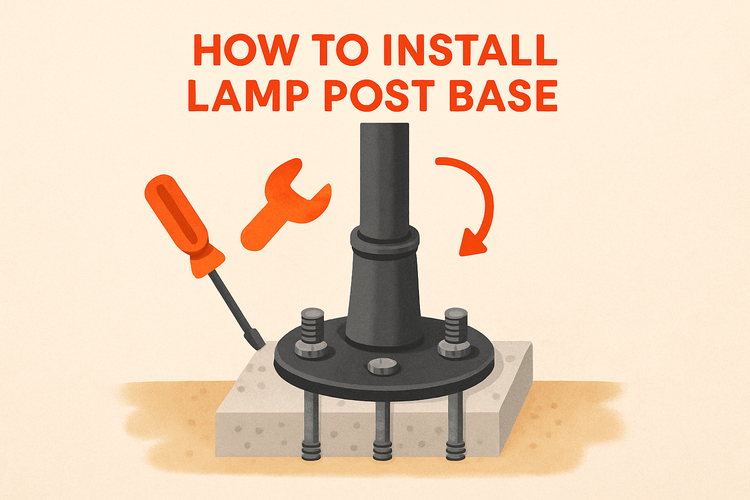
Choosing and Positioning the Post Base
One of the key components in a successful installation is selecting the appropriate post base. It provides the primary connection point between the lamp post and the foundation.
Lamp posts exposed to outdoor elements benefit from a galvanized or powder-coated steel post base, offering both corrosion resistance and long-lasting strength. Depending on your lamp post model, the base may be designed for surface mounting or embedded directly in concrete. Be sure to align the base type with your post's design specifications.
After selecting the correct base, position it precisely in the hole. Use a level to confirm the base sits vertically; misalignment can compromise stability and aesthetics. Ensure anchor bolt holes are properly oriented for the lamp post. For uneven terrain or sloped surfaces, adjustable post bases can help achieve vertical alignment without reshaping the site extensively.
Securing the Base with Concrete
Concrete acts as the foundational structure to keep your lamp post secure. It must be mixed and poured correctly to ensure lasting performance.
In a clean bucket or wheelbarrow, mix concrete according to the manufacturer’s instructions, ensuring a uniform and workable consistency. Pour the mix slowly into the post hole, surrounding the base evenly. Use a shovel or stick to remove air pockets by stirring the wet mix gently around the base. This helps with an even set and prevents voids forming underneath the mount.
Allow the concrete to cure for at least 24 to 48 hours depending on the surrounding temperature and humidity. During this time, avoid disturbances such as leaning tools or applying pressure on the setting base. Once fully cured, double-check the alignment to ensure verticality hasn’t shifted.
Attaching the Lamp Post to the Base
After the base is cured and secure, the next step is attaching your lamp post. This requires appropriate connectors and fasteners for a safe and rigid bond.
Use lag bolts or anchor screws that are compatible with both your post base and lamp post. Begin by aligning the flanged bottom of the lamp post to the pre-positioned bolt holes. Insert and tighten bolts using a wrench in a crisscross pattern to evenly distribute tension. If the lamp post is tall or heavy, consider using additional high wind ties & timber connectors to increase lateral stability against wind or environmental strain.
Once the lamp post is secured, inspect the entire assembly for wobble or misalignment. If necessary, introduce shims between the base and concrete to ensure a snug fit. Some installations may also require sealing around the base plate for water protection—a simple silicone-based outdoor sealant can prevent moisture ingress at the bolt openings.
Final Checks and Electrical Integration
The last phase involves electrical connection and safety testing. Always follow local regulations or hire a licensed electrician for complex wiring.
If your lamp post is prewired, feed the wiring through the base before fixation. For hardwired installations, connect the cable leads using outdoor-rated connectors, ensuring all wires are properly grounded. Use a waterproof junction box if required to add an extra layer of protection for the connections. Always double-check polarity and continuity before sealing up any connections within the post base.
After connection, test the lamp for proper functioning. Inspect not just the light but also any photocell sensors, timers, or switch controls integrated into the design. Finally, add finishing trims if included, such as decorative collars or shields, to hide bolts and enhance aesthetics. Your lamp post is now ready for functional use, offering reliable lighting and a refined exterior addition.